Building a DIY deck is like embarking on a grand adventure in your backyard. Maybe you’re recruiting your friends and neighbors to help, or just tackling it all on your lonesome. Building a deck DIY is more than just extending your living space; it’s about creating a place for memories to be created, it’s a platform for family barbecues, and perhaps a stage for your future rock star performance (who knows?).
However, crafting this outdoor masterpiece comes with its set of challenges and requires a good bit of planning and elbow grease. Fear not, for Royal Deck is here to guide you through this journey, offering our treasure trove of expert advice and pro tips for homeowners all over the Atlanta area. From picking the perfect spot to choosing the right screws, we’ve got you covered. So, let’s roll up our sleeves and jump into the exciting world of DIY deck building!
Kickstarting Your DIY Deck-Building Journey
Building a deck from scratch might sound as daunting as climbing Mount Everest in flip-flops, but with the right tools and guidance, it’s entirely achievable—and immensely rewarding.
Imagine stepping out onto a deck that you’ve brought to life with your own two hands, sweat and tears, and possibly a little blood (hope not if you follow our guide); that’s the kind of satisfaction that lasts a lifetime. However, like any great feat, it requires thorough planning, a bit of know-how, and a sprinkle of patience.
Royal Deck is happy to be your guide on this journey, ready to provide the insights and encouragement needed to turn your DIY dream deck into a reality. Let’s start this adventure with a solid foundation—planning and design.

Laying the Groundwork: Planning and Design
Before you start digging holes or dreaming about deck chairs, let’s talk about planning—arguably the most crucial step in your deck-building odyssey. Here’s how to ensure your project doesn’t end up like a Pinterest fail:
- Scout Your Location: The perfect DIY deck complements your home and landscape. Consider the view, sun exposure (sunbathing or shade lounging?), and how privacy from neighbors might affect your zen. It’s like choosing the best seat in a coffee shop; location is everything.
- Size Matters: Dream big, but plan realistically. The size of your deck should match its purpose. Will it host grand family reunions, or is it a cozy retreat for two? Measure twice, build once.
- Design Your Heart Out: Whether you’re going for a sleek, modern look or a rustic escape, the design of your deck should reflect your personal style and the character of your home. This is your stage; make it shine.
- Legal Stuff: Now, onto the less glamorous but equally important zoning laws, permits, and inspections. Ensuring your deck is up to code is like making sure your passport is valid before an international trip—non-negotiable.
- Sun and Shade: Consider the path of the sun and areas of shade when planning your deck. It’s about creating the perfect ambiance, whether you’re basking in the morning light or enjoying cool evenings under the stars.
- Access and Flow: How will you move from your house to the deck? The transition should be as smooth as your dance moves on a Saturday night.
By taking the time to meticulously plan how to build your DIY deck, you’re setting the stage for a smoother building process and a final product that’ll make your neighbors wish they were as handy as you. Next up, we’ll dive into choosing the right materials to bring your vision to life. Stay tuned, and remember, Royal Deck is here to help every step of the way!
Selecting the Right Materials for Durability and Aesthetics of your DIY Deck
Deciding on the material for your DIY deck is like picking the main ingredient for your signature dish—it defines the flavor! Let’s break down the options:
Pressure-Treated Wood:
The budget-friendly champion. It’s like the sturdy jeans that never go out of style—reliable but require some upkeep to keep looking sharp and fresh.
Pros: Cost-effective, widely available.
Cons: Requires regular maintenance (staining/sealing), susceptible to warping and splintering.
Cedar and Redwood:
Nature’s artwork. These woods offer a natural beauty with a higher price tag, akin to splurging on a gourmet ingredient.
Pros: Natural resistance to pests and decay, less prone to warping.
Cons: More expensive, regular maintenance is needed to preserve color.
Composite Materials:
The low-maintenance sweetheart. Think of it as the durable, fade-resistant outdoor furniture set that keeps your deck looking Pinterest-worthy with minimal effort. At Royal Deck, we use only the top quality composite materials and suggest brands such as Deckorators, Timbertex, and Trex if you go with composite for your DIY Deck.
Pros: Low maintenance, variety of colors and textures, environmentally friendly options.
Cons: Higher initial cost, can get hot underfoot.
Fasteners and Hardware:
Choosing the right fasteners (stainless steel or coated screws) for your material is like picking the right seasoning—it can make or break the longevity of your deck. Ensure compatibility to prevent corrosion.

Essential Tools and Equipment for DIY Deck Building
Building a DIY deck requires more than just enthusiasm; you need the right tools to get the job done right. Here’s your toolkit checklist:
The Basics:
- Tape measure
- Hammer
- Drill
- Level
- Saw
- safety gear (gloves, goggles)
These are the basic essentials; without them, the project is a no-go.
The Extras:
- Circular saw for precision cuts
- a power drill for ease
- a post-hole digger for the foundation work
Although these tools are not entirely necessary they are nice to have and make the job easier.
Rent or Buy:
- High-ticket items like a power auger for digging
- A pneumatic nailer might not be worth the purchase if you’re a one-project wonder.
Renting is an excellent option for a DIY deck builder looking to get the job done right but not breaking the bank with new tool purchases.
Constructing a Solid DIY Deck Foundation: Steps and Tips
Getting the foundation right when building a DIY deck is crucial for the longevity and stability of your deck. Here’s how to ensure a solid base:
- Choose Your Foundation Type: Decide between pier blocks for a more flexible, floating deck or opt for concrete footings for a sturdier, permanent solution. Each has its benefits, depending on the type of deck you’re envisioning and the terrain of your backyard.
- Mark and Dig: Start by carefully marking the perimeter of your deck. Then, dig the footings to the required depth, considering the frost line in your area to prevent shifting during freeze-thaw cycles. Accurate marking and digging are essential steps to ensure your deck is well-supported and level.
- Pour Concrete (If Using): If your design calls for concrete footings, pour them carefully and check that they are level. Allow adequate time for the concrete to cure fully before proceeding with the build. Patience during this phase is key, as rushing can compromise the quality and safety of your deck’s foundation.
This straightforward approach to building a DIY deck foundation ensures your deck rests on a foundation that’s built to last, setting the stage for the next phases of your deck-building project.

Framing Your DIY Deck: Creating a Sturdy Structure
Moving forward with your DIY deck-building project, it’s time to focus on framing—the structural core that shapes your deck:
- Measure and Cut: Accuracy is essential in this step, so it’s probably not a good time to be drinking beer with your friends during this stage of the DIY deck-building process. Ensure you measure twice before cutting to guarantee that your ledger board, joists, and beams are precisely the right size. This attention to detail is what creates a strong and stable foundation for the rest of your DIY deck.
- Attach Ledger Board: The ledger board needs to be securely fastened to your house. This crucial component supports a significant portion of the deck’s weight, so it’s essential to install it correctly, including proper flashing to prevent any water damage.
- Assemble the Frame: With your materials cut to the correct size, layout and then connect your beams and joists as outlined in your plan. This process involves securing each piece to ensure your deck’s frame is solid and reliable.
This step is all about creating a durable frame that will support the deck’s surface and any furniture or gatherings it will host in the future. Ensuring each part is correctly measured, cut, and assembled lays the groundwork for a successful DIY deck construction project.
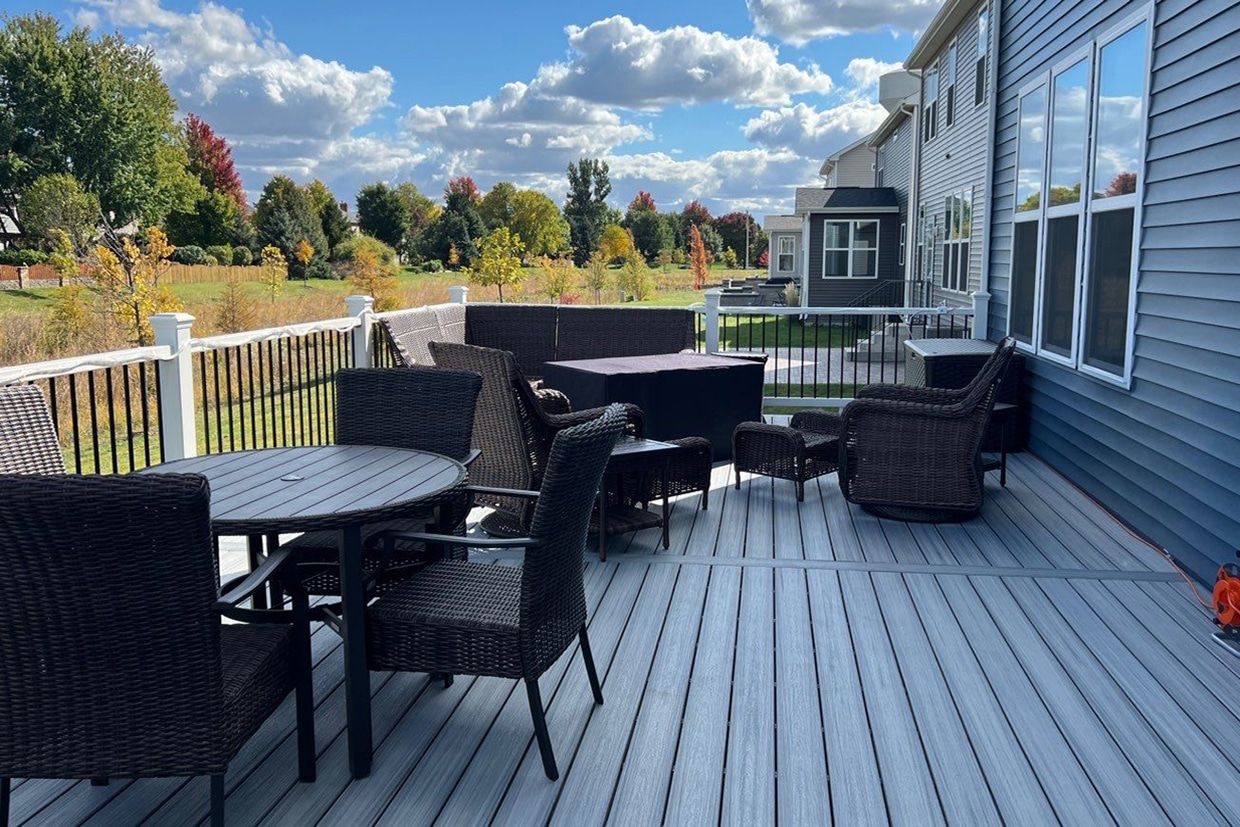
Installing DIY Decking and Railings: The Finishing Touches
With the frame securely in place, the next steps in your DIY deck-building project involve installing the decking boards and railings. These elements not only define the look and feel of your deck but also ensure its functionality and safety.
Decking Boards
- Installation: Begin by laying down the decking boards from the edge of the outer rim joists towards the house, ensuring each board is securely attached to the joists beneath. Use deck screws or hidden fasteners for a clean look. Remember to leave a consistent gap between boards for water drainage and ventilation, which also allows for the natural expansion and contraction of the wood or composite material.
- Spacing: Proper spacing between decking boards is crucial. For wood decks, a gap of about 1/8 to 1/4 inch is recommended, while composite boards may require specific spacing according to the manufacturer’s instructions. This spacing helps prevent water accumulation, reduces the risk of rot, and maintains the integrity of the deck over time.
Railings
- Selection: Choosing the right railing style is essential not only for safety but also for complementing your home’s aesthetic. Railings come in a variety of materials, including wood, composite, aluminum, and vinyl, each offering different levels of durability, maintenance, and design flexibility.
- Installation: Ensure that railings are installed to meet local building codes, which typically specify minimum height and structural integrity standards. Securely anchor railing posts to the deck frame, and use high-quality hardware to assemble rail components. Consider integrating lighting into your railings for added safety and ambiance.
Stairs
- Design: If your deck is more than a single step above ground level, you’ll need to build stairs for access. The design of your stairs should match the deck’s materials and style, and comply with local building codes, which dictate specifics about stair width, riser height, and tread depth.
- Construction: Building deck stairs requires careful planning and execution. Each step needs to be uniform in height and depth to ensure safety. Use stringers as the backbone of your stairway, and attach treads and risers using galvanized screws or nails for durability.
By carefully and accurately installing decking boards, railings, and stairs, you not only enhance the beauty and functionality of your outdoor space but also ensure a safe and enjoyable environment for everyone. These finishing touches bring your DIY deck project full circle, transforming it into a cohesive, inviting retreat. Your friends and family will be so impressed with your hard work and craftsmanship, that they may be asking you to build their deck!

Adding the Final Touches to Your DIY Deck
You’re almost there! With the structure built and the main components in place, it’s time to focus on the finishing touches that will protect your deck and reflect your personal style.
Seal or Stain
Protection: Wood decks benefit greatly from a protective layer of sealant or stain. This not only enhances the natural beauty of the wood but also shields it from UV rays, moisture, and wear. Select a product based on the type of wood you’ve used and the look you’re aiming for—transparent sealants for a natural look or pigmented stains to add color and depth.
Application: Ensure your deck is clean and dry before application. Apply the sealant or stain with a brush, roller, or sprayer, following the manufacturer’s directions. Typically, you’ll need to reapply every two to three years, depending on your deck’s exposure to the elements and foot traffic.
Lighting
Ambiance: Adding lighting can transform your deck into a cozy evening retreat. Options range from simple solar post caps to sophisticated LED systems integrated into the railings and stairs. Lighting not only adds to the ambiance but also enhances safety by illuminating steps and edges.
Furniture and Accessories
Personalization: The final step in bringing your deck to life is adding furniture and accessories. Choose pieces that suit your lifestyle, whether you’re creating a dining area for outdoor meals, a lounge for relaxation, or a vibrant space for entertaining. Consider durable, weather-resistant materials and fabrics designed for outdoor use.
Accessories: Planters, outdoor rugs, and decorative elements add color and texture to your deck. These details make the space feel inviting and comfortable, reflecting your personal style and making the deck truly your own.
Regular Maintenance
Upkeep: To ensure your deck remains a welcoming outdoor haven for years to come, commit to regular maintenance. This includes periodic cleaning, checking for and addressing any signs of wear or damage, and refreshing the sealant or stain as needed.
Congratulations on building your DIY deck! Can you believe it, you’re finally done! This finishing phase of adding protective finishes, personalized touches, and committing to ongoing care is what turns a DIY construction project into a cherished extension of your home. Enjoy the fruits of your labor with friends and family, creating memories in your newly crafted outdoor space.

Start Building Your DIY Dream Deck with Royal Deck
You now have all the tools, tips, and techniques at your fingertips to embark on the rewarding journey of building your DIY deck. This guide serves as your roadmap, guiding you through each phase of the project with confidence. However, we understand that even the most ambitious DIY enthusiasts might have questions or need professional advice along the way.
That’s where Royal Deck comes in. Our expertise isn’t just for full-service projects; we’re here to support your DIY deck-building ambitions as well. Whether you’re seeking material recommendations to suit your climate, need a second opinion on your design, or decide you’d like professional help for certain stages of your project, our team is just a call or click away.
We encourage you to leverage Royal Deck’s years of experience and depth of knowledge to ensure your deck is everything you’ve dreamed of and more. Visit the Royal Deck website for additional resources, inspiration, and contact information. Our gallery of completed projects can spark ideas, and our tips and advice section can help you navigate the finer points of deck construction.
Building a DIY deck is more than just creating an outdoor space; it’s about enhancing your home, and your lifestyle, and making memories that last a lifetime. Call us today, or drop by our website to explore how we can contribute to your DIY deck-building success. Let’s turn your backyard into the oasis you’ve always wanted. Happy building!
As a top Atlanta deck builder, Royal Deck specializes in crafting incredible new decks, resurfacing existing ones, and designing porches that perfectly complement your home in the Atlanta Metro Area.